This tutorial walks you through the steps of creating a Hello World web app example with Spring Boot and FreeMarker
FreeMarker is a Java-based template engine to generate text outputs such as HTML web pages and emails
What you'll build
What you'll need
JDK 8+ or OpenJDK 8+
Maven 3+
Your favorite IDE
Project structure
Following is the final project structure with all the files we would create
├── src
│   └── main
│       ├── java
│       │   └── com
│       │       └── hellokoding
│       │           └── springboot
│       │               └── view
│       │                   ├── Application.java
│       │                   └── HelloController.java
│       └── resources
│           ├── static
│           │   ├── css
│           │   │   └── main.css
│           │   └── js
│           │       └── main.js
│           ├── templates
│           │   └── hello.ftlh
│           └── application.properties
└── pom.xml
pom.xml is the configuration file used by Maven to manage project dependencies and build process, it is usually placed at the project root directory
Web controller classes are used for mapping user requests to FreeMarker view template files, would be created inside src/main/java
FreeMarker view template files would be created inside src/main/resources/templates. We use the .ftlh file extension instead of ftl to enable the HTML auto-escaping since Spring Boot 2.2
CSS and JavaScript files would be created inside src/main/resources/static
application.properties is a configuration file used by Spring Boot, would be created inside src/main/resources
Application.java is a launch file for Spring Boot to start the application, would be created inside src/main/java
Create a sample Spring Boot application
Besides using IDE, we can create and init a new Spring Boot project by using Spring Initializr via web UI or command-line tools such as cURL, HTTPie, or Spring Boot CLI. Learn more about using these tools here
For getting started, we will choose Web and Devtools as dependencies. Below is an example with cURL
curl https://start.spring.io/starter.zip \
    -d dependencies=web,devtools \
    -d javaVersion=1.8 \
    -d packageName=com.hellokoding.springboot \
    -d groupId=com.hellokoding.springboot \
    -d artifactId=hk-springboot-freemarker \
    -o hk-springboot-freemarker.zip
Unzip the hk-springboot-freemarker.zip file and import the sample project into your IDE
Project dependencies
For a Spring Boot FreeMarker web application, we will need the following dependencies on the pom.xml file
spring-boot-starter-webprovides all the dependencies and auto-configuration we need to develop a web application in Spring Boot, including the Tomcat embedded servlet containerspring-boot-starter-freemarkerprovides the support for compiling FreeMarker template files
The library versions can be omitted as it is resolved by the parent pom provided by Spring Boot
<dependency>
    <groupId>org.springframework.boot</groupId>
    <artifactId>spring-boot-starter-web</artifactId>
</dependency>
<dependency>
    <groupId>org.springframework.boot</groupId>
    <artifactId>spring-boot-starter-freemarker</artifactId>
</dependency>
Apart from that, we also use the spring-boot-devtools dependency to auto-trigger an application restart or live reload in the development environment whenever Java class or static files on class-path change, respectively. However, to leverage that, you need to configure your IDE to auto-save and auto-compile when files are modified
In the production environment, when a Spring Boot application is launched from a jar file, the devtools is auto disabled
<dependency>
    <groupId>org.springframework.boot</groupId>
    <artifactId>spring-boot-devtools</artifactId>
    <scope>runtime</scope>
    <optional>true</optional>
</dependency>
Create Web Controller
Create a Spring Boot web controller file to map HTTP requests to FreeMarker view template files
[HelloController.java]
import org.springframework.stereotype.Controller;
import org.springframework.ui.Model;
import org.springframework.web.bind.annotation.GetMapping;
import org.springframework.web.bind.annotation.RequestParam;

@Controller
public class HelloController {
    @GetMapping({"/", "/hello"})
    public String hello(Model model,
                        @RequestParam(value="name", required=false, defaultValue="World") String name) {
        model.addAttribute("name", name);
        return "hello";
    }
}
@Controller indicates the annotated class is a web controller
@GetMapping maps HTTP GET request for "/" (home page) and "/hello" web page to the hello method
@RequestParam binds method parameter name to request query string parameter
Model is an object for sharing data between handler and view template
The view template name is defined by the return statement of the handler and the spring.freemarker.suffix config property which defined in the application.properties file. So in this hello handler method, the return view is hello.ftlh
View Template
Create a simple FreeMerker view template file to show a dynamic message to user
[hello.ftlh]
<!DOCTYPE html>
<html lang="en">
<head>
    <meta charset="UTF-8">
    <title>Hello ${name}!</title>
    <link href="/css/main.css" rel="stylesheet">
</head>
<body>
    <h2 class="hello-title">Hello ${name}!</h2>
    <script src="/js/main.js"></script>
</body>
</html>
The dynamic message is ${name}. It is a FreeMarker interpolation enabling FreeMarker template files to access the data from the model. Its value is filled by the model.addAttribute("name", name); defined in the above HelloController
Since Spring Boot 2.2, use .ftlh extension instead of .ftl for FreeMarker template files to enable the HTML auto-escaping for FreeMarker interpolations ${...}
Static files
Create 2 simple CSS and JavaScript files inside /src/main/resources/static
The main.css file is linked into FreeMarker view via <link href="/css/main.css" rel="stylesheet">
[main.css]
.hello-title{
    color: darkgreen;
}
The main.js file is included into FreeMarker view via <script src="/js/main.js"></script>
[main.js]
(function(){
    console.log("Hello World!");
})();
Application Configurations
Create application.properties file inside src/main/resources to configure Spring MVC view resolver via the spring.freemarker properties
[application.properties]
spring.freemarker.template-loader-path: classpath:/templates
spring.freemarker.suffix: .ftlh
The spring.freemarker.template-loader-path property defines the path to FreeMarker template files, the spring.freemarker.suffix property defines the file extension we would like to use
Run and Test
Create an Application class and use @SpringBootApplication annotation to launch the application
[Application.java]
import org.springframework.boot.SpringApplication;
import org.springframework.boot.autoconfigure.SpringBootApplication;

@SpringBootApplication
public class Application {
    public static void main(String[] args) {
        SpringApplication.run(Application.class, args);
    }
}
Run the application by typing the following command on the terminal console at the project root directory
./mvnw clean spring-boot:run
You would see this text in the console
o.s.b.w.embedded.tomcat.TomcatWebServer : Tomcat started on port(s): 8080 (http) with context path ''
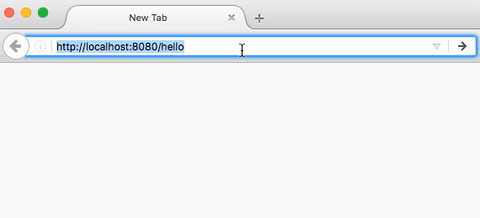
Access to http://localhost:8080 on your web browser, the following response is expected
Hello, World!
Try to modify the FreeMarker, CSS, and JavaScript files, and refresh the browser, the HTML response would be updated accordingly thanks to the support from spring-boot-devtools
In a production environment, you may like to package and run the Spring Boot application as a single jar file
./mvnw clean package
java -jar target/hk-springboot-freemarker-0.0.1-SNAPSHOT.jar
Conclusion
In this tutorial, we learned to create a Hello World web application in Spring Boot with FreeMarker. The source code is available on Github
You may also like the following tutorials