This tutorial will walk you through the process of creating a Spring Boot FreeMarker From Submission example
FreeMarker is a Java-based template engine to generate text outputs such as HTML web pages and emails
What you will build
An HTML form with input text, textarea, a Submit form, and a Reset form button
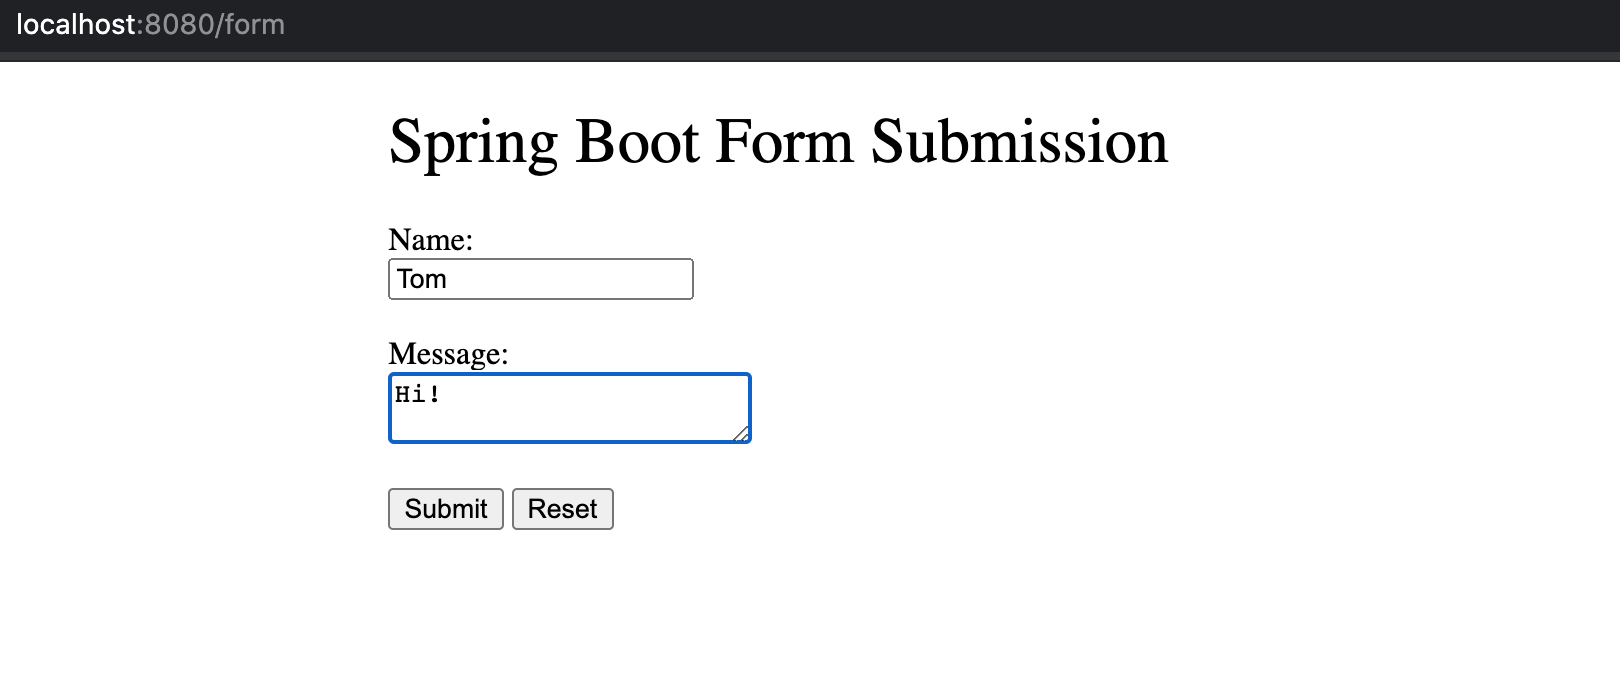
When user hits the Reset button, clear input data on the form
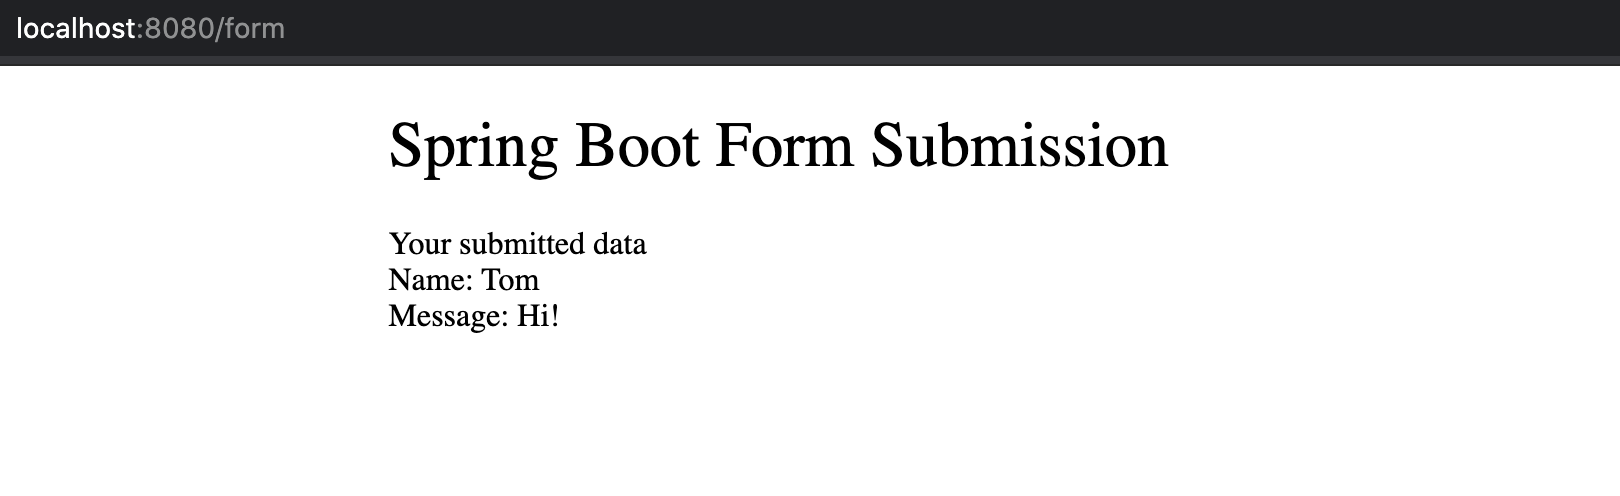
When user hits the Submit button, send input data to Spring Boot server and show the submitted data to user
What you need
JDK 1.8+
Maven 3+
Project structure
Following is the final project structure with all the files we would create
├── src
│   └── main
│       ├── java
│       │   └── com
│       │       └── hellokoding
│       │           └── springboot
│       │               ├── FormController.java
│       │               ├── User.java
│       │               └── WebApplication.java
│       └── resources
│           ├── static
│           │   ├── css
│           │   │   └── main.css
│           │   └── js
│           │       └── main.js
│           ├── templates
│           │   └── form.ftlh
│           └── application.properties
└── pom.xml
pom.xml is the configuration file used by Maven to manage project dependencies and build process, it is usually placed at the project root directory
FormController.java is a Spring Boot web controller used for mapping user requests to FreeMarker view template files, and handling form submission, would be created inside src/main/java
User.java is a custom data model used for defining user input form data, would be created inside src/main/java
FreeMarker view template files would be created inside src/main/resources/templates. We use the .ftlh file extension instead of .ftl to enable the HTML auto-escaping since Spring Boot 2.2
CSS and JavaScript files would be created inside src/main/resources/static
application.properties is a configuration file used by Spring Boot, would be created inside src/main/resources
WebApplication.java is a launch file for Spring Boot to start the application, would be created inside src/main/java
Initialize a new Spring Boot application
Besides using IDE, we can create and init a new Spring Boot project by using Spring Initializr via web UI or command-line tools such as cURL, HTTPie, or Spring Boot CLI
The below is a cURL example with dependencies are web and freemarker
curl https://start.spring.io/starter.zip \
    -d dependencies=web,freemarker \
    -d javaVersion=1.8 \
    -d packageName=com.hellokoding.springboot \
    -d groupId=com.hellokoding.springboot \
    -d artifactId=hk-springboot-freemarker \
    -o hk-springboot-freemarker.zip
Unzip the hk-springboot-freemarker.zip file and import the sample project into your IDE
Project dependencies
For a Spring Boot FreeMarker web application, we will need the following dependencies on the pom.xml file
spring-boot-starter-web provides all the dependencies and auto-configuration we need to develop a web application in Spring Boot, including the Tomcat embedded servlet container
spring-boot-starter-freemarker provides the support for compiling FreeMarker template files
The library versions can be omitted as it is resolved by the parent pom provided by Spring Boot
<dependency>
    <groupId>org.springframework.boot</groupId>
    <artifactId>spring-boot-starter-web</artifactId>
</dependency>
<dependency>
    <groupId>org.springframework.boot</groupId>
    <artifactId>spring-boot-starter-freemarker</artifactId>
</dependency>
Define data model for the input form
Create User.java as a data model class with 2 properties including name and message corresponding to the text inputs on the form
[User.java]
public class User {
    private String name;
    private String message;

    public String getName() {
        return name;
    }

    public void setName(String name) {
        this.name = name;
    }

    public String getMessage() {
        return message;
    }

    public void setMessage(String message) {
        this.message = message;
    }
}
Create Form Controller
Create FormController.java as a Spring Boot web controller
Define a POST API to handle form validation and submission
Define a GET API to serve the form input UI
Both APIs are available at
/formURI
[FormController.java]
package com.hellokoding.springboot;

import org.springframework.stereotype.Controller;
import org.springframework.ui.Model;
import org.springframework.web.bind.annotation.GetMapping;
import org.springframework.web.bind.annotation.PostMapping;

@Controller
public class FormController {
    @GetMapping("/")
    public String index() {
        return "redirect:/form";
    }

    @GetMapping("/form")
    public String formGet() {
        return "form";
    }

    @PostMapping("/form")
    public String formPost(User user, Model model) {
        model.addAttribute("user", user);
        return "form";
    }
}
Create FreeMarker form view template file
Create a FreeMarker form view template file to show HTML input controls and receive user-submitted data
[form.ftlh]
<!DOCTYPE html>
<html lang="en">
    <head>
        <meta charset="UTF-8">
        <title>Spring Boot Form Submission</title>
        <link href="/css/main.css" rel="stylesheet">
    </head>
    <body>
        <h1>Spring Boot Form Submission</h1>
        <#if user?? >
            Your submitted data<br>
            Name: ${user.name}<br>
            Message: ${user.message}<br>
        <#else>
            <form action="/form" method="post">
                <div>Name:</div>
                <input type="text" name="name"/>
                <br/><br/>
                <div>Message:</div>
                <textarea rows="2" name="message"></textarea>
                <br/><br/>
                <input type="submit" value="Submit"/>
                <input type="reset" value="Reset"/>
            </form>
        </#if>
        <script src="/js/main.js"></script>
    </body>
</html>
In the above template file, the HTML form post action <form action="/form" method="post"> is mapped by Spring Boot to the POST form API @PostMapping("/form") defined in the above FormController
When one user clicks Sumit, input data will be sent to the POST form API and auto-mapped to the User data model
We used FreeMarker interpolations ${...} to show data model value to user, and FreeMarker ifelse directives <#if>...<#else>... to dynamic generate conditional HTML ouput
Static files
Create 2 simple CSS and JavaScript files inside /src/main/resources/static
The main.css file is linked into FreeMarker view via <link href="/css/main.css" rel="stylesheet">
[main.css]
body {
    width: 50%;
    margin-left: auto;
    margin-right: auto;
}

body * {
    font-weight: 400;
}
The main.js file is included into FreeMarker view via <script src="/js/main.js"></script>
[main.js]
(function(){
  console.log("Hello FreeMarker Form!");
})();
Application Configurations
Create application.properties file inside src/main/resources to configure Spring MVC view resolver via the spring.freemarker properties
[application.properties]
spring.freemarker.template-loader-path: classpath:/templates
spring.freemarker.suffix: .ftlh
The spring.freemarker.template-loader-path property defines the path to FreeMarker template files, the spring.freemarker.suffix property defines the file extension we would like to use
Run the application
Create an Application class and use @SpringBootApplication annotation to launch the application
[WebApplication.java]
package com.hellokoding.springboot;

import org.springframework.boot.SpringApplication;
import org.springframework.boot.autoconfigure.SpringBootApplication;

@SpringBootApplication
public class WebApplication {
    public static void main(String[] args) throws Exception {
        SpringApplication.run(WebApplication.class, args);
    }
}
Run the application by typing the following command on the terminal console at the project root directory
./mvnw clean spring-boot:run
You would see this text in the console
o.s.b.w.embedded.tomcat.TomcatWebServer : Tomcat started on port(s): 8080 (http) with context path ''
Access to http://localhost:8080/form on your web browser and start to explore the application
Conclusion
In this tutorial, we learned to build a Spring Boot FreeMarker form submission example. The source code is available on Github
You may also like the following tutorials