This tutorial walks you through the steps of creating an Email Verification web application Example with Spring Boot, MySQL, and Amazon AWS SES
What you'll build
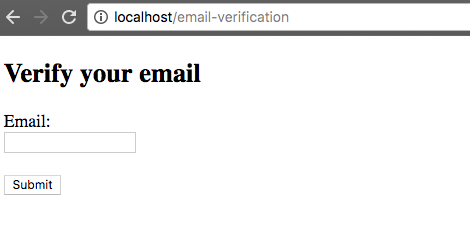
Email Verification Form
![]()
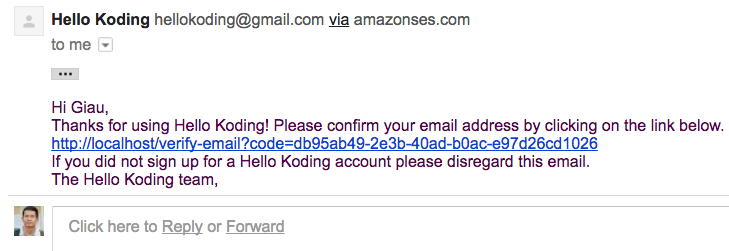
Send verification email through Amazon SES
![]()
Verify email service
![]()
What you'll need
- Docker CE
- Amazon SES account
- SMTP Credentials of your Amazon SES account
- Verified From email and To email on SES console
Stack
- Docker
- Spring Boot
- Java Mail API
- Spring Data JPA
- MySQL
- NGINX
- Maven
Init project structure
You can create and init a new Spring Boot project by using Spring CLI or Spring Initializr. Learn more about using these tools here
The final project structure as below
├── src
│   └── main
│       ├── java
│       │   └── com
│       │       └── hellokoding
│       │           └── account
│       │               ├── model
│       │               │   ├── MailProperties.java
│       │               │   ├── User.java
│       │               │   ├── VerificationForm.java
│       │               │   └── VerificationToken.java
│       │               ├── repository
│       │               │   ├── UserRepository.java
│       │               │   └── VerificationTokenRepository.java
│       │               ├── service
│       │               │   ├── SendingMailService.java
│       │               │   └── VerificationTokenService.java
│       │               ├── web
│       │               │   └── AccountController.java
│       │               └── WebApplication.java
│       └── resources
│           ├── static
│           │   ├── css
│           │   │   └── main.css
│           │   └── js
│           │       └── main.js
│           ├── templates
│           │   ├── email-verification.ftl
│           │   └── verification-form.ftl
│           └── application.properties
├── Dockerfile
├── docker-compose.yaml
└── pom.xml
Application dependencies
Create JPA Entities
Create JPA Repositories
Create Services
Create Controllers
Create FreeMarker View template
Application Configuration
Run with Docker
Prepare Dockerfile for Java/Spring Boot application and docker-compose.yml for MySQL Server
Type the below command at the project root directory, make sure your local Docker is running
docker-compose up
Run with JDK/OpenJDK, Maven and MySQL Server local
On
application.properties, update data source user name + password to your local configs, update data source urlhk-mysqltolocalhostThen type this command at the project root directory
mvn clean spring-boot:run
Test
Open your browser and access to http://localhost:8080


