Besides using IDE, you can create and initialize a new Spring Boot project by using Spring Initializr via the web interface at https://start.spring.io/ or via command-line tools such as cURL, HTTPie, and Spring Boot CLI
Using Spring Initializr via web UI
You can follow these steps to generate and download a new Spring Boot project with Spring Initializr web tool
1) Access the tool at https://start.spring.io/ on your browser

2) Select the project type, language and Spring Boot version. By default, Maven, Java, and the latest Spring Boot version is selected. Don't worry if you cannot find the version you like, it can be updated later when the downloaded project imported into your IDE
3) Update project metadata such as group, artifact, name, description, package name, packaging type (jar or war), and Java version
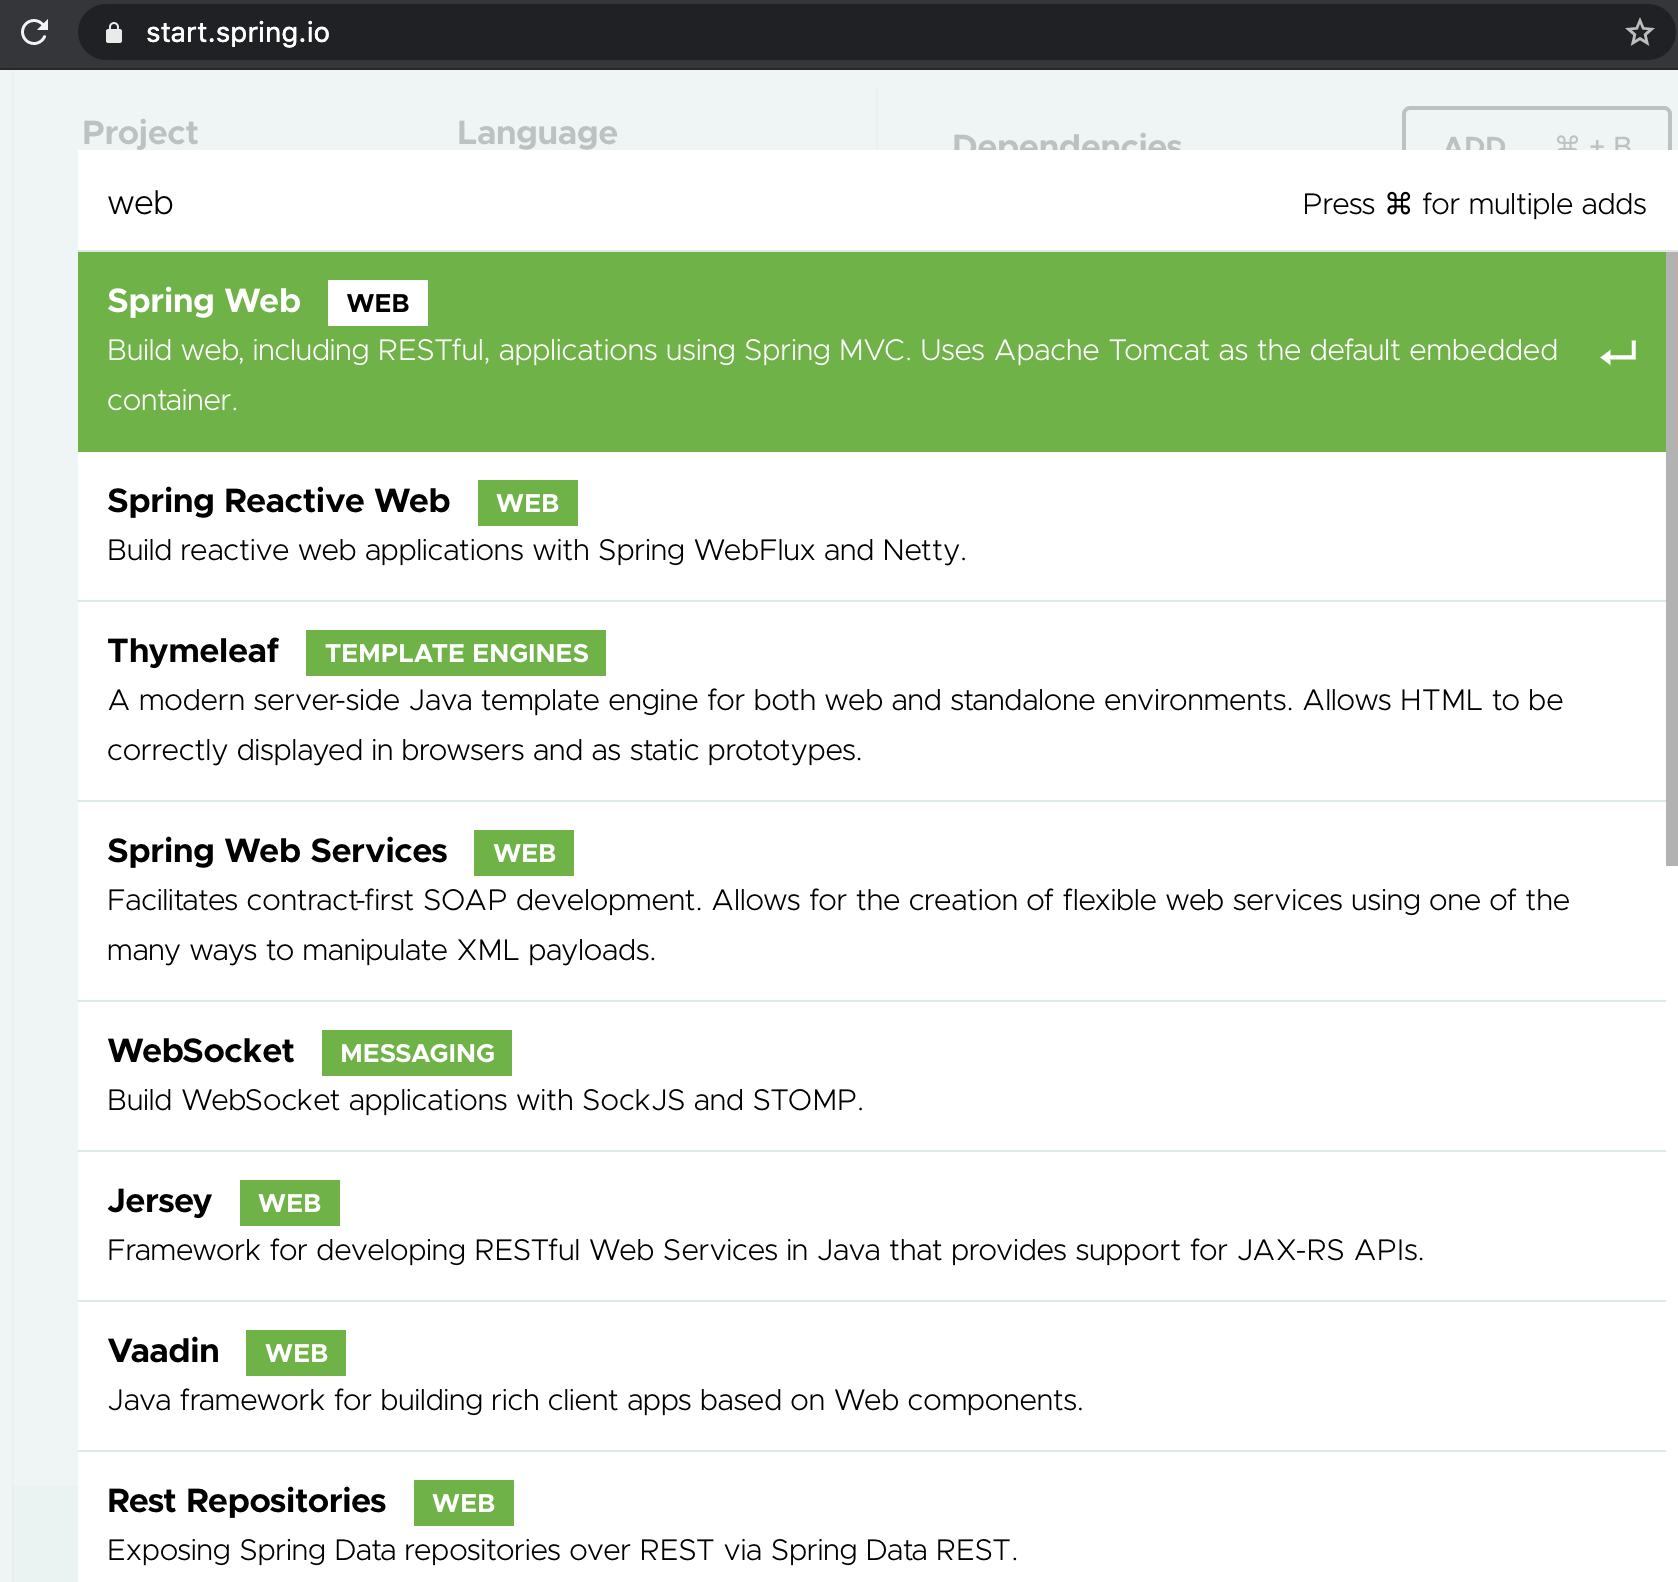
4) Click on Add dependencies, select Spring Reactive web and Spring Boot Actuator
5) Click on the Explore button to see how the project structure and files content look like
6) Click on Generate, a demo.zip would be generated and downloaded into your browser. Unzip that file into a directory, you would have the following project structure
├── src
│   └── main
│       ├── java
│       │   └── com
│       │       └── hellokoding
│       │           └── tutorials
│       │               └── demo
│       │                   └── DemoApplication.java
│       └── resources
│           └── application.properties
├── .gitignore
├── HELP.md
├── mvnw
├── mvnw.cmd
└── pom.xml
7) Run the Spring Boot project with the mvnw script, given that JDK has been already installed and JAVA_HOME environment variable already set on your local machine
./mvnw spring-boot:run
You would see the following output in the console
... Exposing 2 endpoint(s) beneath base path '/actuator'
... Netty started on port(s): 8080
... Started DemoApplication in ...seconds
A Spring Boot web application would be started at localhost port 8080. As we included the Spring Boot actuator dependency, an Spring Boot Actuator web service would be available at path '/actuator'
8) Access localhost:8080/actuator on your browser to explore the Spring Boot Actuator endpoints
Using Spring Initializr with cURL or HTTPie
If you don't like to leave your terminal, you can use Spring Initializr with a command-line HTTP client such as cURL or HTTPie
The following cURL command downloads a new Spring Boot project from Spring Initalizr in tgz file. The tar -xzvf - command extracts the downloaded file into the current directory
curl https://start.spring.io/starter.tgz \
    -d dependencies=webflux,actuator \
    -d javaVersion=1.8 \
    -d packageName=com.hellokoding.tutorials \
    -d groupId=com.hellokoding.tutorials \
    -d artifactId=hk-springboot \
| tar -xzvf -
Here is another version using HTTPie
http https://start.spring.io/starter.tgz \
    dependencies==webflux,actuator \
    javaVersion==1.8 \
    packageName==com.hellokoding.tutorials \
    groupId==com.hellokoding.tutorials \
    artifactId==hk-springboot \
| tar -xzvf -
You can also generate and download a zip file in addition to tgz file
curl https://start.spring.io/starter.zip \
    -d dependencies=webflux,actuator \
    -d javaVersion=1.8 \
    -d packageName=com.hellokoding.tutorials \
    -d groupId=com.hellokoding.tutorials \
    -d artifactId=hk-springboot \
    -o hk-springboot.zip
http https://start.spring.io/starter.zip \
    dependencies==webflux,actuator \
    javaVersion==1.8 \
    packageName==com.hellokoding.tutorials \
    groupId==com.hellokoding.tutorials \
    artifactId==hk-springboot \
    -o hk-springboot.zip
Using Spring Initializr with Spring Boot CLI
If you love to use Spring Initialzr via cURL or HTTPie but looking for a less verbose command, then try Spring Boot CLI
To use Spring Boot CLI, you have to first install it on your local machine by using package managers such as Homebrew and MacPorts on Mac, SDKMAN! on UNIX based systems, Scoop on Windows
On Mac, Homebrew installs the tool into /usr/local/bin
brew tap pivotal/tap
brew install springboot
Install guide for other environments can be found at here
On your terminal, type the following command to create a new Spring Boot project with the default template
spring init my-spring-boot
The CLI will create a new directory named my-spring-boot if not existing, and generate the following project structure inside it
├── src
│   ├── main
│   │   ├── java
│   │   │   └── com
│   │   │       └── example
│   │   │           └── demo
│   │   │               └── DemoApplication.java
│   │   └── resources
│   │       └── application.properties
│   └── test
│       └── java
│           └── com
│               └── example
│                   └── demo
│                       └── DemoApplicationTests.java
├── .gitignore
├── HELP.md
├── mvnw
├── mvnw.cmd
└── pom.xml
You can now open the new project in your favourite editors, edit the artifactId, groupId and project version, add more dependencies into pom.xml, modify the package and application name and start working on it
If you'd like to create a new project with the above predefined settings, learn to do it by providing more options to the command
The spring init command
Spring Boot CLI provides $ spring init command to initialize a new project using Spring Initalizr
The syntax of spring init command as below
spring init [options] [location]
location can be either an absolute or relative directory path, default is the current directory.
The directory will be auto created if not existing. The command will exit if any duplicate files, use --force option if you'd like to overwrite
options can be the combination of the following
-d: list of dependencies in comma-separated format to include in the project, use--listto discover-b: Spring Boot version, default is the latest stable release-j: Java version-g: groupId, default iscom.example-a: artifactId, default is the value oflocationparam, hyphens-is used as a separator in case of absolute path-v: project version, default is0.0.1-SNAPSHOT--description: project description, default isDemo project for Spring Boot--package-name: package name,-n: project name; infer application name
The default values will be used if location or options is omitted
Beside spring init, Spring Boot CLI also offers other commands for working with Groovy scripts, you can explore more by typing $ spring --help
Create a new Spring Boot project with predefined settings
On your terminal, type the following command to create a new Spring Boot project at directory another-spring-boot with spring-boot-starter-web and spring-boot-starter-actuator as dependencies, com.hellokoding.tutorials as package name, HelloApplication as app name
spring init -d=web,actuator -n=hello \
    --package-name=com.hellokoding.tutorials \
    another-spring-boot
The CLI will create a new directory named another-spring-boot if not existing, and generate the following project structure inside it
├── src
│   ├── main
│   │   ├── java
│   │   │   └── com
│   │   │       └── hellokoding
│   │   │           └── tutorials
│   │   │               └── HelloApplication.java
│   │   └── resources
│   │       ├── static
│   │       ├── templates
│   │       └── application.properties
│   └── test
│       └── java
│           └── com
│               └── hellokoding
│                   └── tutorials
│                       └── HelloApplicationTests.java
├── .gitignore
├── HELP.md
├── mvnw
├── mvnw.cmd
└── pom.xml
Conclusion
In this tutorial, we learned some ways to create and initialize a new Spring Boot project by using Spring Initializr via a web interface, cURL, HTTPie, and Spring Boot CLI